
Quickstart Composer Actions 101

Quickstart your Setup
Getting setup is as simple as running the command below. Simply copy & paste into your terminal.
git clone https://github.com/dtechvision/fc-composer-actions/ composer-action && cd composer-action && npm installWe are cloning the dTech starter/example for Composer Actions which uses NextJS and getting the dependencies installed so we’re good to go.
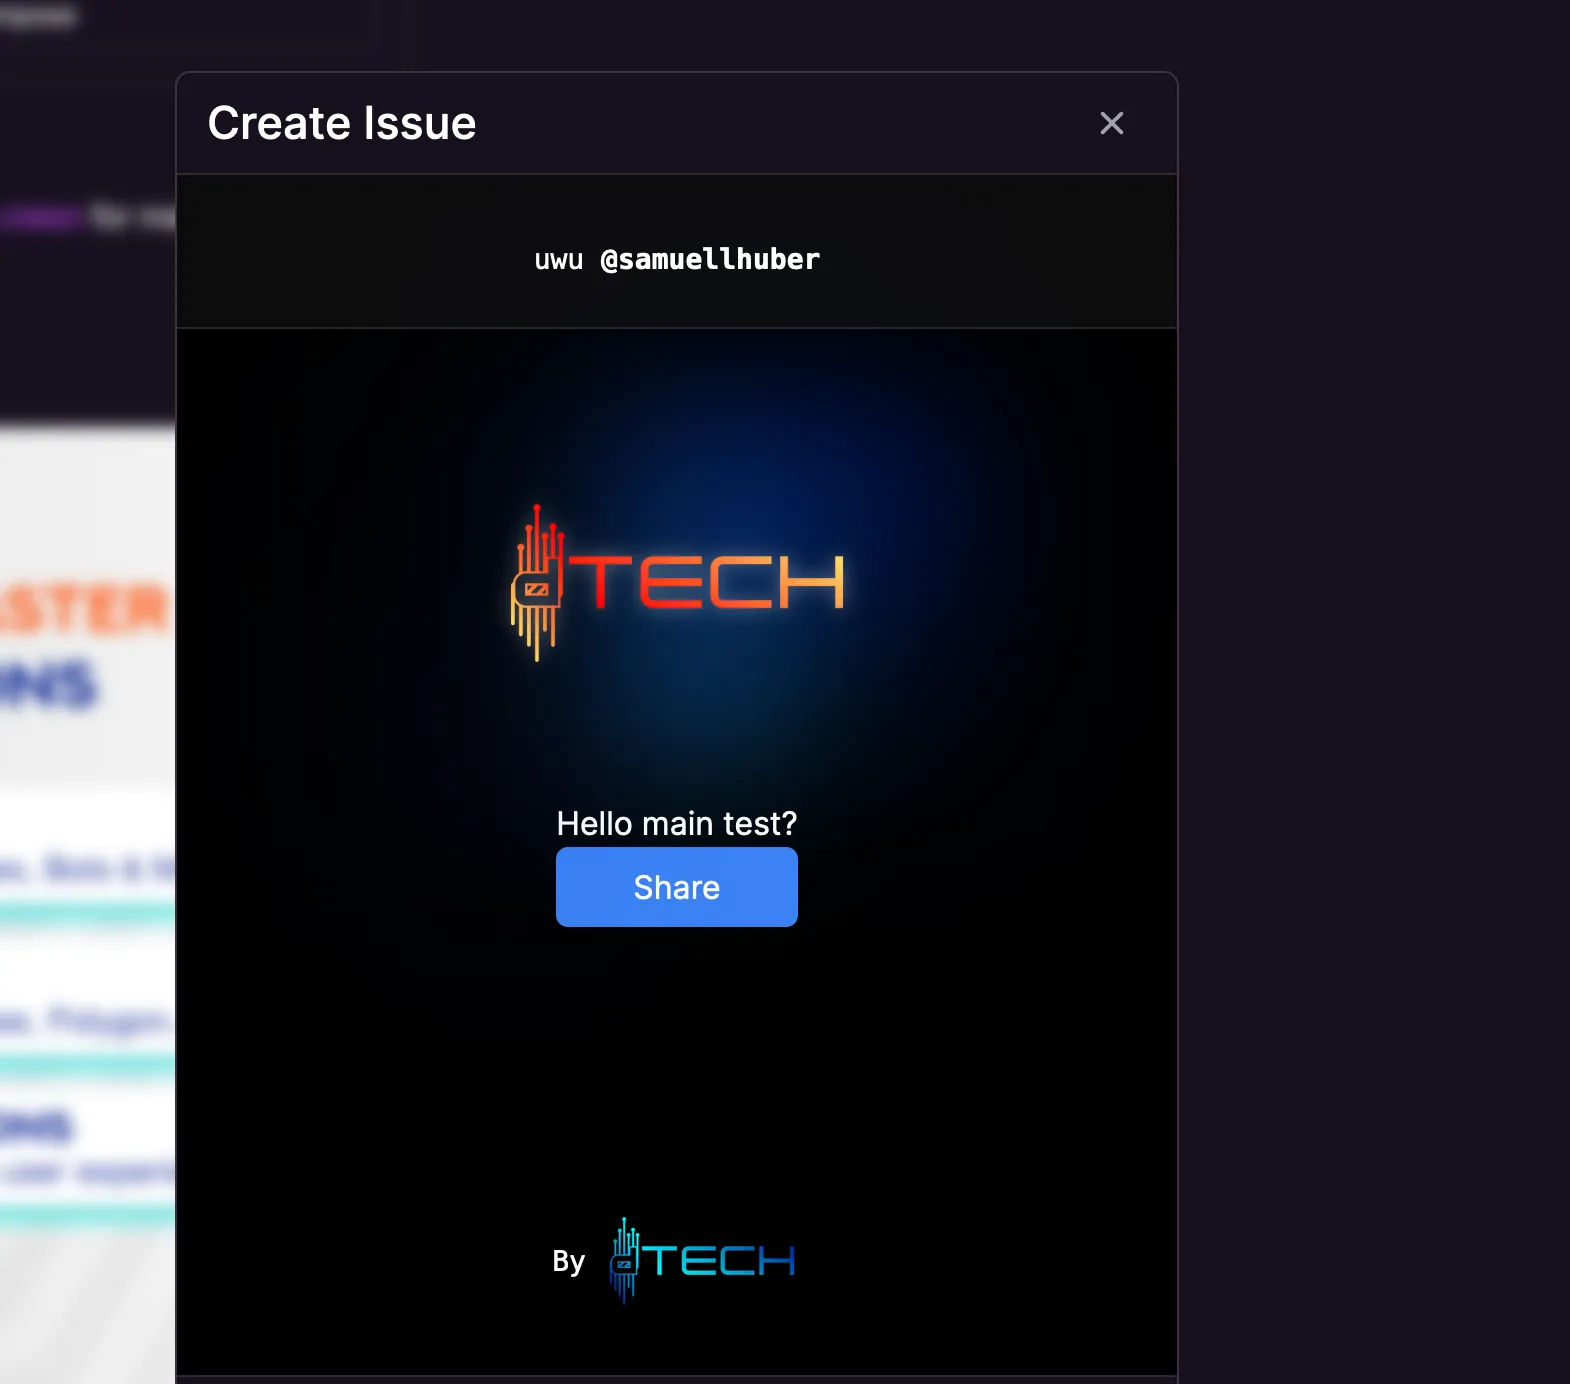
You could deploy this publicly or test locally already. On deployment and testing in Warpcast you would see a Composer Action where on clicking the button you are sharing a predefined post.
Shipping custom Composer Actions
Let’s get Snake in there. It’s a fun game and I would love to play it from my social media feed and brag about no one beating my score!
Wait we can do that? Yes. Composer Actions aren’t limited to Forms where you input data and they then generate a new post for you, but that we can do as well.
So let’s start simple and move to Snake.
A simple post template form as Composer Action
A simple post template takes in some user choices and fills the post.
What we will do is ask for you three favorite ice cream flavors and publishing an engaging post showcasing that.
Of course you can build Issue templates for bug reports, customer feedback, input into your application, game interactions or much much more.
To start understand where to start look at the layout of the template
||__ /src/pages/api/compose.ts||__ /src/pages/index.tsxThe API Route in compose.ts defines what the Farcaster client (e.g. Warpcast) will show as Composer Action.
Looking at the code we see a type, title, url being returned. Which the client will use and show that URL to the user.
Additionally if there’s a GET request sent then we return the metadata about our Composer Action. This information is shown to users seeing our Action when browsing all registered actions or seeing previews.
Make sure the image is square, no more than 100x100px.
if (req.method === "POST") {  const data = req.body;  console.log(data);
  res.status(200).json({    type: "form",    title: "dTech.vision",    url: "http://localhost:3000", // make sure this is your public URL e.g. http://localhost:3000 for local testing  });} else if (req.method === "GET") {  res.status(200).json({    type: "composer",    name: "Create Poll",    icon: "check", // supported list: https://docs.farcaster.xyz/reference/actions/spec#valid-icons    description: "Create a poll frame",    aboutUrl: "https://your-app-server.example.com/about",    imageUrl: "https://your-app-server.example.com/static/logo.png",    action: {      type: "post",    },  });}
the other file src/pages/index.tsx has our user interface. This is what the user sees.
The Farcaster client knows what to show by our API Route and the user flow.
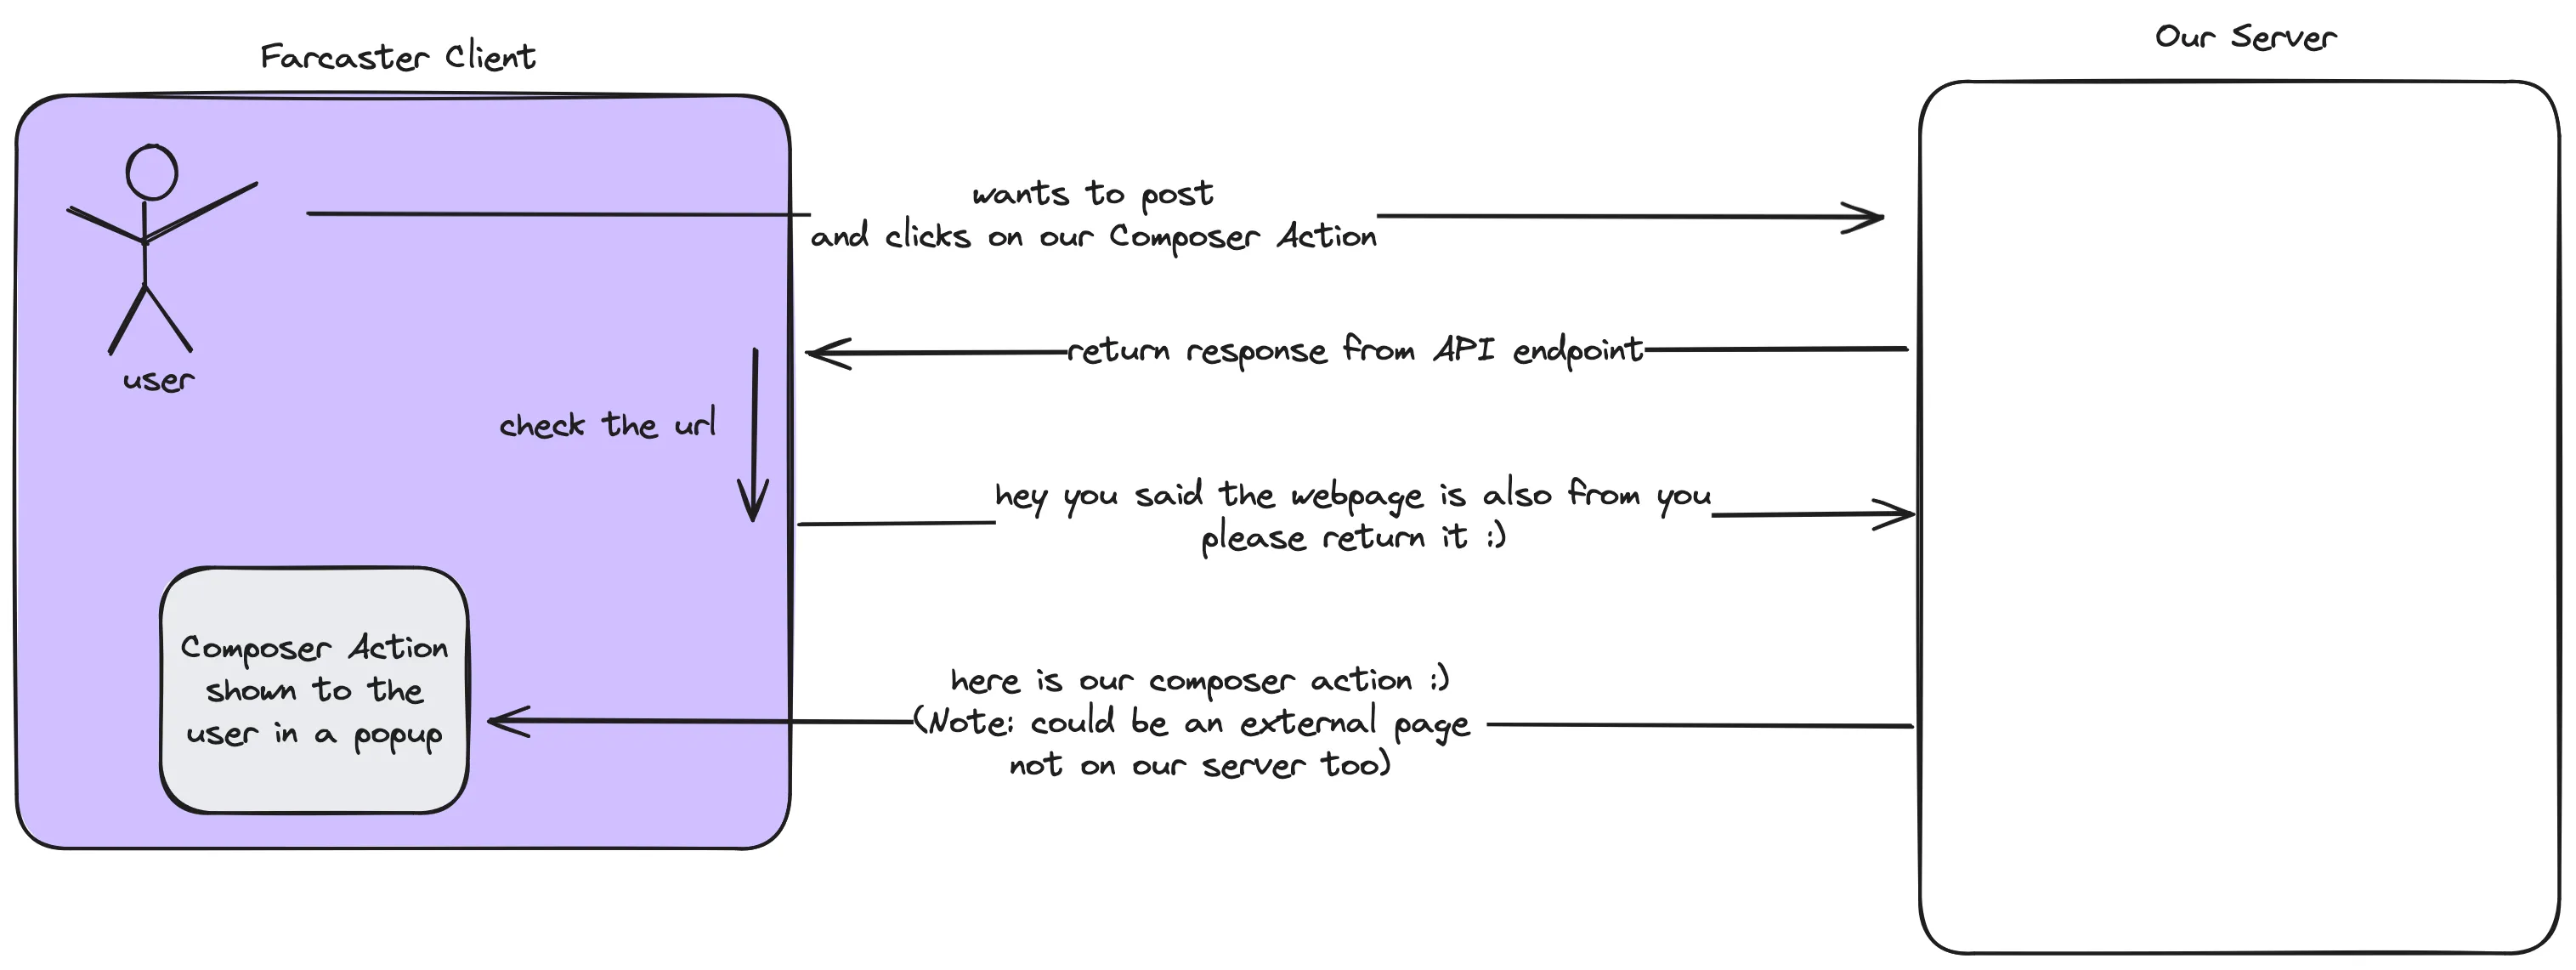
Now remember this could be an external page as well. Then it’s just shown and if it doesn’t return a new cast well then you just have a mini app in the Farcaster client.
But we’re building an ice cream flavor picker to share as cast.
What we need to let the Farcaster client know that the user is done in our app and what the new cast is push the new cast.
This is done by the following code snippet in the example src/pages/index.tsx.
The snippet pushes to the Farcaster client the JSON data and information that this “createCast” is our new post.
window.parent.postMessage( { type: "createCast", data: { cast: { text: "dTech is the best!", embeds: ["https://dtech.vision"], }, }, }, "*");Now as seen in the sample this is part of a button so the user triggers it, though anyway we invoke this we prefill the cast and we can have embeds like images, videos and other media in there too!
To build our Form we now need to build a Form UI and prefill the cast text with the variables selected in our Form.
We will change the <p> Hello main test? </p> part of the sample and exchange it with our form.
import Image from "next/image";import { Inter } from "next/font/google";import { useState } from "react";
const inter = Inter({ subsets: ["latin"] });
export default function Home() {  const [selectedFlavors, setSelectedFlavors] = useState<string[]>([]);
  const handleFlavorChange = (flavor: string) => {    if (selectedFlavors.includes(flavor)) {      setSelectedFlavors(selectedFlavors.filter(f => f !== flavor));    } else if (selectedFlavors.length < 3) {      setSelectedFlavors([...selectedFlavors, flavor]);    }  };
  const flavors = [    "Chocolate", "Vanilla", "Strawberry", "Mint Chocolate Chip",    "Cookies and Cream", "Rocky Road", "Butter Pecan", "Coffee",    "Pistachio", "Salted Caramel"  ];
  return (    <main      className={`flex min-h-screen flex-col items-center justify-between p-24 ${inter.className}`}    >      <div className="z-10 max-w-5xl w-full items-center justify-between font-mono text-sm lg:flex">        {/* ... (previous code remains unchanged) */}      </div>
      <div className="mb-32 grid text-center lg:max-w-5xl lg:w-full lg:mb-0 lg:grid-cols-4 lg:text-left">        <div className="col-span-4 flex justify-center">          <form className="bg-white shadow-md rounded px-8 pt-6 pb-8 mb-4 w-full max-w-md">            <p className="mb-4 font-bold text-lg">Select your three favorite ice cream flavors:</p>            {flavors.map((flavor, index) => (              <div key={index} className="mb-2">                <input                  type="checkbox"                  id={`flavor${index + 1}`}                  name={`flavor${index + 1}`}                  value={flavor}                  checked={selectedFlavors.includes(flavor)}                  onChange={() => handleFlavorChange(flavor)}                  className="mr-2"                />                <label htmlFor={`flavor${index + 1}`}>{flavor}</label>              </div>            ))}            <p className="mt-4 text-sm text-gray-600">              Selected: {selectedFlavors.length}/3            </p>          </form>        </div>    // ...  )
If you wish to test your user interface remember it is a full blown webpage.
npm run dev and navigate to your browser.

What is missing? We have not adjusted our Submit Button to make sure that the ice cream flavors are reflected. Right now we still have the predefined message.
Let’s change that by first remembering what we picked, and then making sure that it is used in the template.
The following code is an excerpt, merge it with the above adjustment and you’re good.
First adjust the button to use a handleShare button and only work if the user selected all three of his favorite flavors.
<button className="px-4 py-2 text-white bg-blue-500 rounded-md shadow-md hover:bg-blue-600" onClick={handleShare} disabled={selectedFlavors.length !== 3}> Share</button>Now we add the handleShare function above our return statement and below the flavors
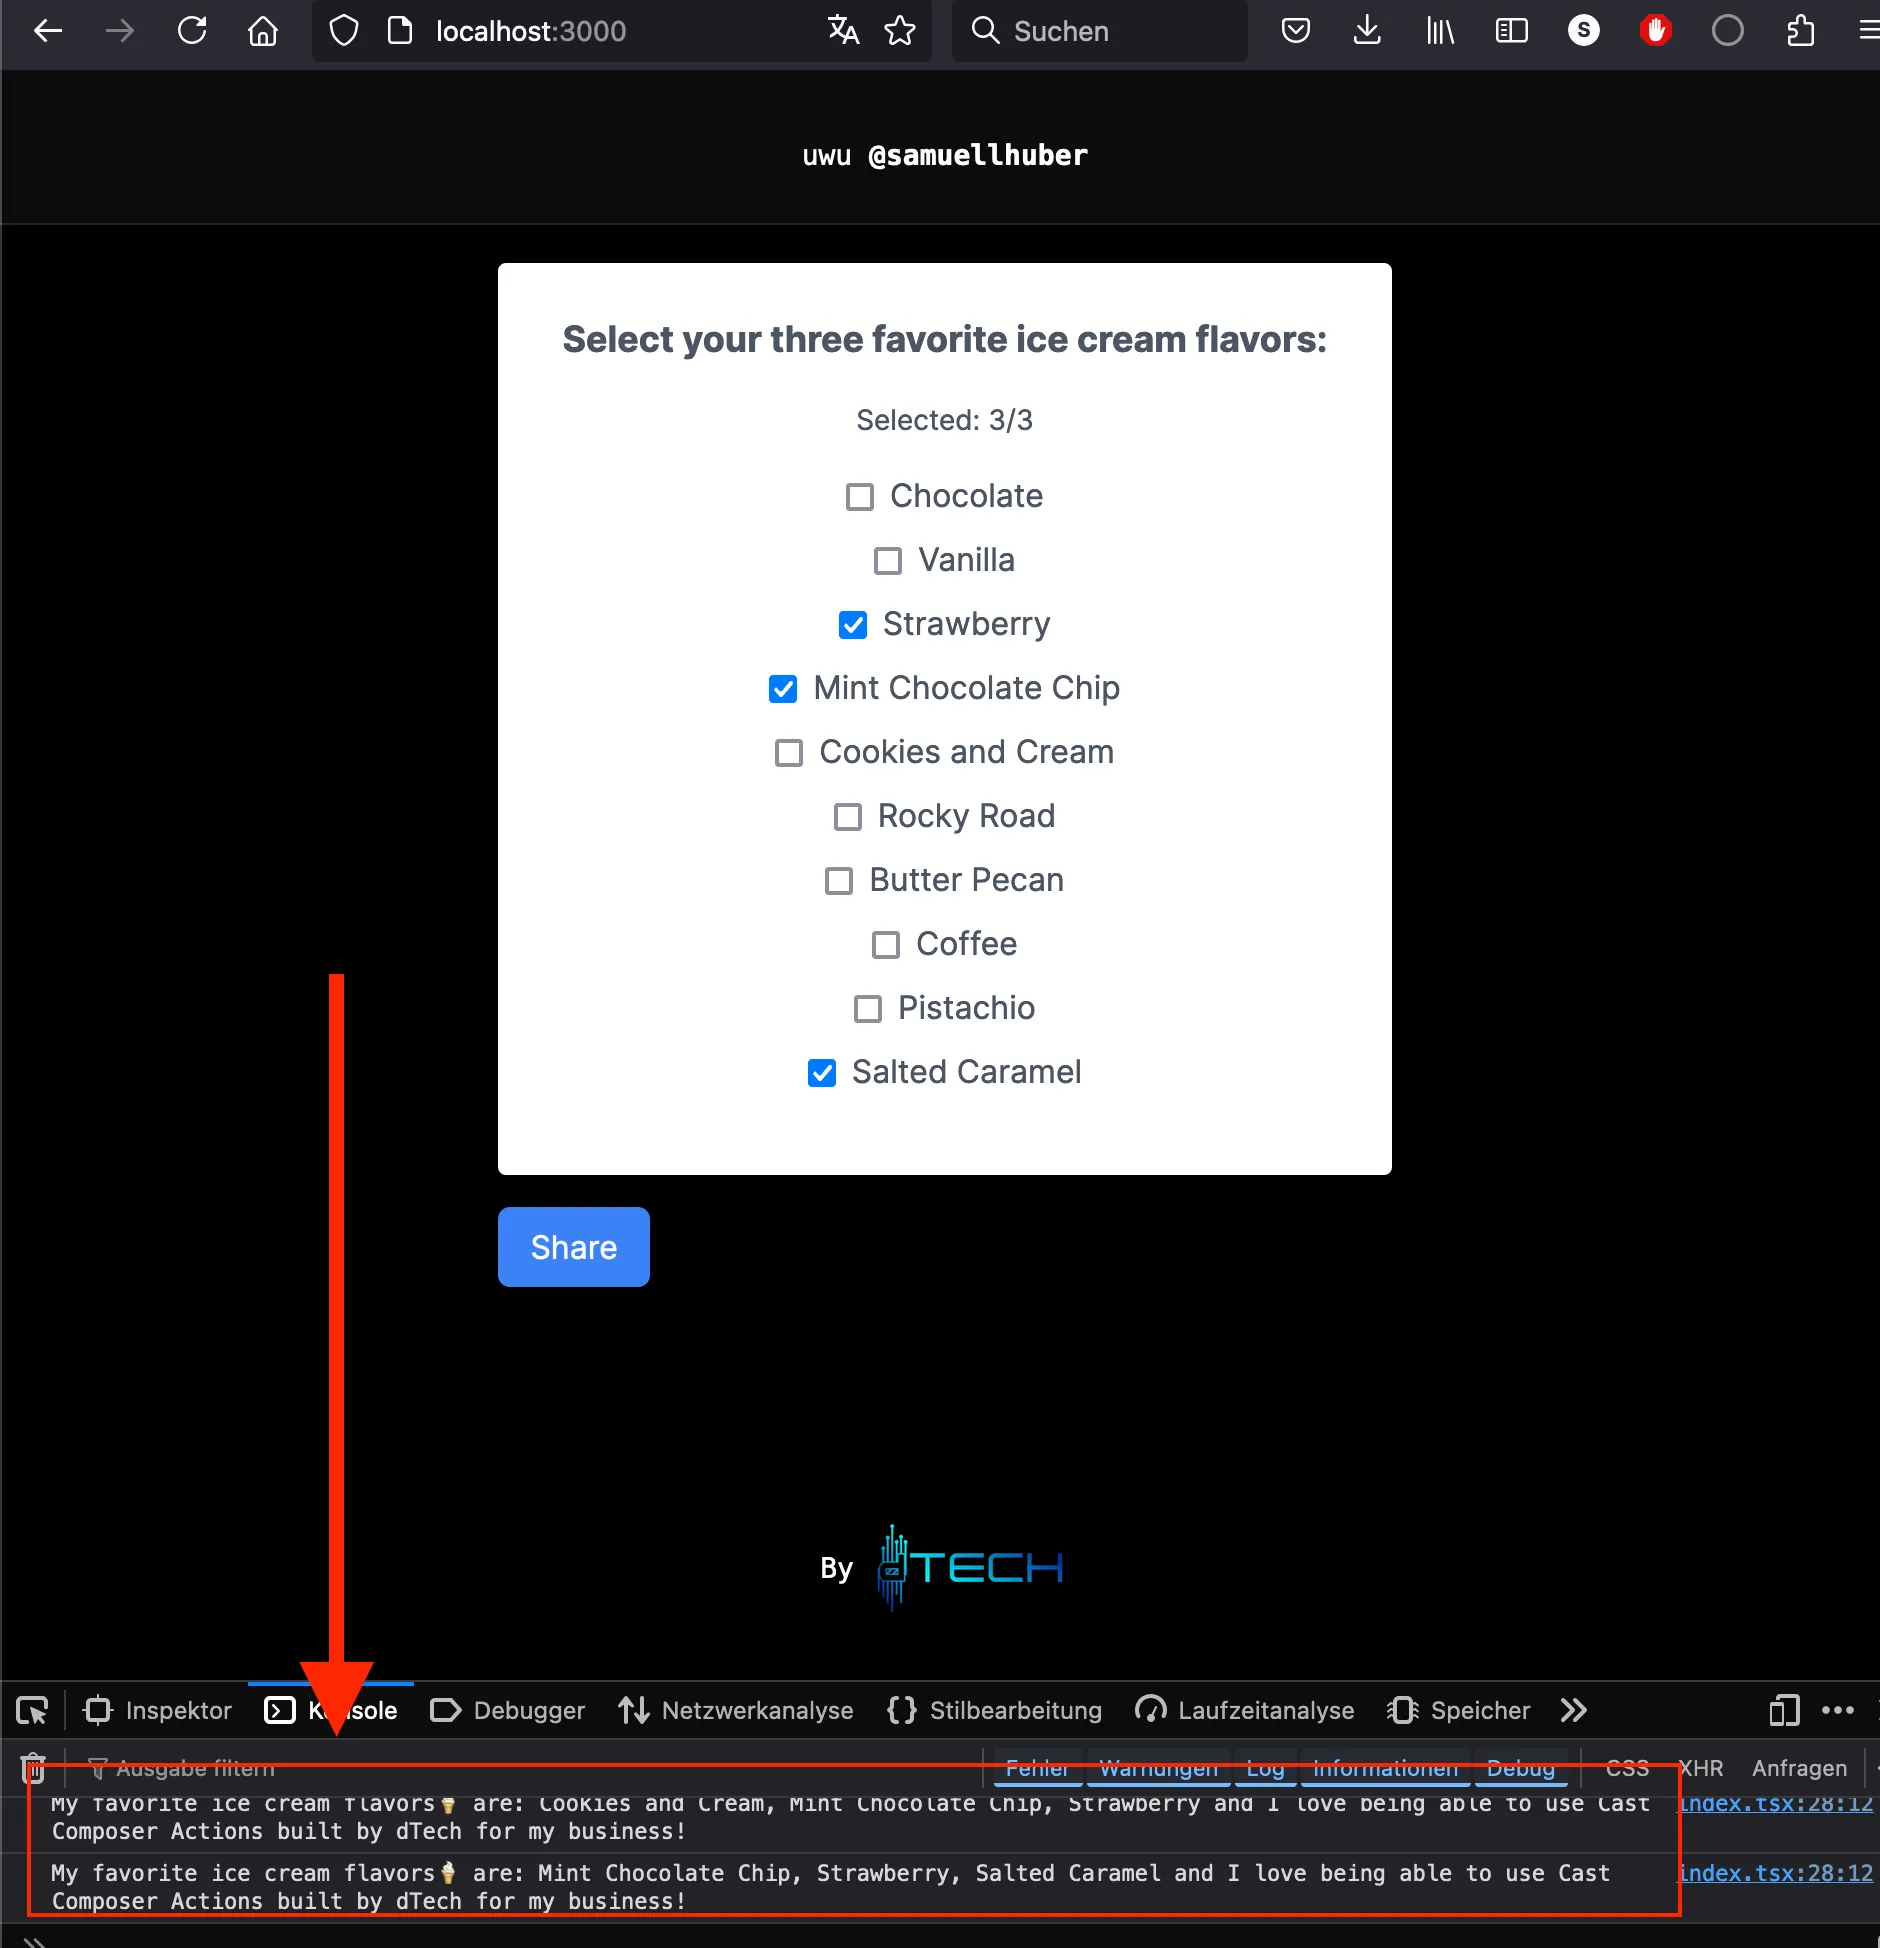
const handleShare = () => {  const [first, second, third] = selectedFlavors;  const castText = `My favorite ice cream flavors🍦 are: ${first}, ${second}, ${third} and I love being able to use Cast Composer Actions built by dTech for my business!`;
  window.parent.postMessage(    {      type: "createCast",      data: {        cast: {          text: castText,          embeds: ["https://dtech.vision"],        },      },    },    "*"  );};
Remember it’s just a webpage, so if we log the castText variable using console.log(castText); before the window.parent… we can see in our browser at localhost that it works.
What is left? We need to deploy it
Deploying our cast action
Once you have it up (works anywhere you can deploy NodeJS), copy the link of your api endpoint (/api/compose) and paste that into the Warpcast Debugger
Type something in the cast composer and click Test Action.
You’ll see you working cast action producing the Ice Cream Flavors
Snake as Composer Action sharing Scores
Coming Soon!