
Frames V1: How to do a custom starting Image per User in our Frame?
We assume you already know what Frames are and how to develop them, else learn what Frames are here.
How to do a custom starting Image per User when sharing our Frame?
What we want to achieve is that when sharing it loads a new frame and the background image with the pfp and number from the api. Where we can use any data to customize the start frame. You do not need to use an API but likely you want to show some statistics that are customized to the user, so we’ll do that.
We will go through how to customise the frame so when people share it with a share button it creates a customized image for that user and shares that to their cast (post). You can think of this as ‘share frame’ button with custom frame input.
Additionally we will walk you through how to post that image you get as new frame upon recasting it.
Warpcast Cast Intents to let users share your Frame in the feed
To get a user to share a post we need to let the Farcaster client know. This can be done with deep links. Warpcast calls these Intents and they are documented here. We will use these Cast Intents to create a link that will share our Frame.
Let’s say our frame link is https://dtech.vision/ and the text is “Hey @samuellhuber look!”, then we can create a share link for our Frame with the predefined text to be shared as Cast Intent:
Note: Make sure you URL encode the text. This means a ’ ’ becomes %20 and so on.
https://farcaster.xyz/~/compose?text=Hey%20@samuellhuber%20look!&embeds[]=https://dtech.vision/Want to try if this works? click here and it should look like the below screenshot.

How to build the ‘share frame’ button with custom frame input to get a per user customized frame image shared
Now to build the share button we can add a button to our Frame that will have action type “link” and contain the Url we created as Cast Intent.
As Frames are pure HTML Meta Tags, we can achieve it by providing these. Here is the above share button implemented as HTML metatag in a Farcaster Frame. If you are using a Frames Framework will need to recreate it in the Framework (Button of type Link with content of your Cast Intent URL).
<html>  <head>    <meta property="fc:frame" content="vNext" />    <meta property="fc:frame:image" content="https://dtech.vision/frame.png" />    <meta property="fc:frame:image:aspect_ratio" content="1:1" />
    <!-- Our Share Button follows here -->    <meta property="fc:frame:button:1" content="Share Frame" />    <meta property="fc:frame:button:1:action" content="link" />    <meta property="fc:frame:button:1:target" content="https://farcaster.xyz/~/compose?text=Hey%20@samuellhuber%20look!&embeds[]=https://dtech.vision/" />    <!-- End of our share Button -->  </head></html>
Now one thing to remember though is that the link we just used will share our Frame, but it is not customized!
If a user shares this frame link we will render the default start screen. To be able to customize the starting frame image, we want to pass additional info to your Frame server!
We can do this by adding url parameters. We will add an fid parameter, that clarifies which FID is the one sharing. Let’s use 1 then our new link is
https://farcaster.xyz/~/compose?text=Hey%20@samuellhuber%20look!&embeds[]=https://dtech.vision/?fid=1Notice the ?fid=1 at the end of the link? this is our url parameter that the server can read and use to not return the default image, but return a custom image!
On your server where you build the share button link, you can customize that parameter, it doesn’t need to be an FID. Just make sure when building the return frame metadata (aka returning the frame response) that you include the parameter and fill it.
How to share the custom frame image on the server side when building the frame
Now that we have the parameter in the URL, we can use it to customize the frame image. We can use the parameter to get the user’s profile picture and number from an API and use that to create a custom image.
The general idea is when handling the request, read the url parameter and return the customized frame image in a frame.
In Pseudo code this is what we’re going to do
getFrameImage(fid):  returns profilePicture of that fid
starrtFrame(image):  returns a frame with that custom image
// handle the request sent to your Frame Server to get the initial frameget handler ():  fid = request.url_params['fid']  image = getFrameImage(fid)  return startFrame(image)
Typescript example code of a custom frame image
Now that you know how to achieve our custom frame image on the server side let’s build a real world sample
First we will build the image generation function based on the FID, we’ll use dummy images here
function getFrameImage(fid: number): string { return `https://picsum.photos/id/${fid}/200/300`}now we can call this and get our custom image link back. If you want to get actual farcaster profile pictures, you can look up the user data on Farcaster Hubs or use another API.
Now that we know how to get the image link we need to build our Frame Metadata. We’ll return pure HTML here, but you are free to use any Frames Framework.
// returns the custom html for our Frame. If you use a framework, this works similarly in your Framework. We use html to be framework agnonstic herefunction startFrame(image: string) {  return `  <html>    <head>      <meta property="fc:frame" content="vNext" />      <meta property="fc:frame:image" content=${image} />      <meta property="fc:frame:image:aspect_ratio" content="1:1" />
      // Our Frame Button follows here      <meta property="fc:frame:button:1" content="Check Yours" />      <meta property="fc:frame:button:1:action" content="post" />      <meta property="fc:frame:button:1:target" content="https://dtech.vision/" />      // End of our Frame Button    </head>  </html>  `}
As you can see the code uses the image string to create our custom Frame.
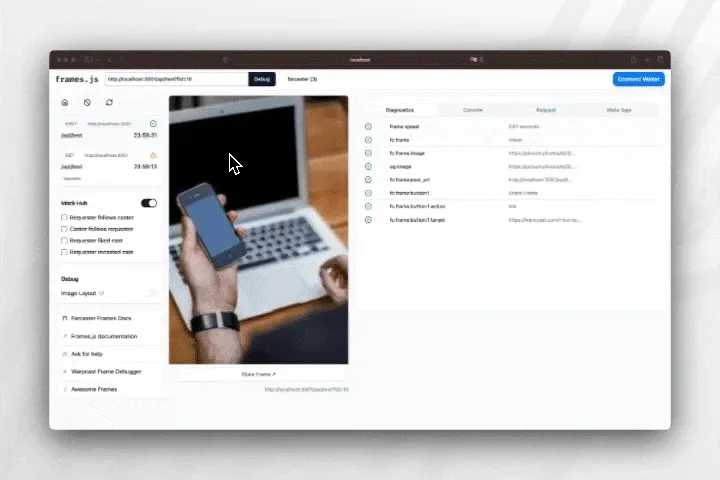
Notice what changed from our Share Button frame we built earlier is the Button is now of type post so it sends a Frame Message to the server which allows us to return the new Frame Image and share button! In case you want to learn how to build frames, please follow the quickstart frames development guide here.
Additionally the image is also different! It is now customized based on our Frame image!
If you combine this within your Frame and follow the Pseudocode you have now learned how to build viral frame loops with sharing leading to more sharing based on custom frame images per user!
To handle the request we will now put it all together and provide a sample implemented in NextJS
Custom Image on the shared Frame Code Sample in NextJS
The sample
- handles the initial GET request potentially with custom frame image based on the user sharing (FID url parameter)
- uses a function to get the custom image
- when pressing the button on the frame shows the user his image and then lets them share it
to run the sample change the url to your url and just run it inside any nextjs app or create a new one.
import { NextApiRequest, NextApiResponse } from 'next';
const url = 'http://localhost:3001/api/test';
interface FrameRequest {  untrustedData: {      fid: number;      url: string;      messageHash: string;      timestamp: number;      network: number;      buttonIndex: number;      inputText?: string;      castId: {          fid: number;          hash: string;      };  };  trustedData: {      messageBytes: string;  };}
function getFrameImage(fid: number): string {    return `https://picsum.photos/id/${fid}/200/300`;}
function startFrame(image: string) {  return `  <html>    <head>      <meta property="fc:frame" content="vNext" />      <meta property="fc:frame:image" content=${image} />
      <!-- Our Frame Button follows here -->      <meta property="fc:frame:button:1" content="Check Yours" />      <meta property="fc:frame:button:1:action" content="post" />      <meta property="fc:frame:button:1:target" content=${url} />      <!-- End of our Frame Button here -->    </head>  </html>  `}
// function that builds the frame the user sees when clicking to recieve their custom onefunction shareFrame(image: string, fid: number): string {    return `    <html>        <head>            <meta property="fc:frame" content="vNext" />            <meta property="fc:frame:image" content="${image}" />            <meta property="fc:frame:button:1" content="Share Frame" />            <meta property="fc:frame:button:1:action" content="link" />            <meta property="fc:frame:button:1:target" content="https://farcaster.xyz/~/compose?text=Check%20out%20my%20custom%20frame!&embeds[]=${url}?fid=${fid}" />        </head>    </html>    `;}
export default function handler(req: NextApiRequest, res: NextApiResponse) {    if (req.method === 'GET') {      /**       ** this is the start frame       **/        try {            // Get the FID from query parameters            const { fid } = req.query;
            let numericFid = parseInt(fid as string);            if (isNaN(numericFid)) {              numericFid = 0;            }
            // Generate custom image based on FID            const customImage = getFrameImage(numericFid);
            // Generate and return the custom Frame            const frameHtml = startFrame(customImage);
            res.setHeader('Content-Type', 'text/html');            res.status(200).send(frameHtml);        } catch (error) {            console.error('Error processing frame:', error);            res.status(400).json({ error: 'Bad Request' });        }    } else if (req.method === 'POST') {      /**       ** this is the share frame       **/      try {        // depending on your security assumptions you may wnat to know it's really the user interacting with the frame        // in this case you should validate the frameMessage and use data only after verification        const { untrustedData } = req.body as FrameRequest;
        const fid = untrustedData.fid;
        const customImage = getFrameImage(fid);        const frameHtml = shareFrame(customImage, fid);
        res.setHeader('Content-Type', 'text/html');        res.status(200).send(frameHtml);      } catch (error) {        console.error('Error processing POST frame:', error);        res.status(400).json({ error: 'Bad Request' });      }    } else {        res.setHeader('Allow', ['GET', 'POST']);        res.status(405).end(`Method ${req.method} Not Allowed`);    }}